Monday, February 27, 2012

Homemade Trophy


This homemade trophy I made for our school's Read-a-Thon. They were really easy to make, but took a long time to dry. I didn't take pictures of this as I made it because I didn't know I was going to be posting it to a blog. But a few teachers told me I should so here it is.


How I made it.
I went to the dollar store (I just looked around until I found what fit together.) and found a little board book (you could use any kind of item here to fit your purpose), a plastic goblet, and a desk tray (upside down) for the bottom.

Then using Craft glue (a lot with the book), I glued around the rim of the glass and placed it on the desk tray. Then put a layer of glue on the bottom of the goblet and positioned the book. Then added glue to any where that might still need it. Then let it dry. (This can take a few days.)

After it was dry I then coated the trophy with gold spray paint. (I would do a couple of coats just to be sure.) After this dried I added sticker letters and did a layer of "Mod Podge." Let dry and you have yourself an awesome (cheap) trophy!


Sponge Bob Party Game

I always love to do different types of "Pin the Tail on the Donkey" games. I just tweak them to whatever theme my child picks. This year my son picked Sponge Bob. I didn't take pictures while making this and also don't have a template to follow but I will try and tell you what I did.


Final Product!

I purchased two sheets of poster board and one was for SB's body and the other was for the pants, legs, arms, mouth, eyes, and nose. When doing anything that is circular I like to use plates, cups, or anything that I can find around my house that is the size I need. With this in mind I did the eyes and the palms of the hands.  Craft paint is my coloring of choice when doing something of this size. Less work then a marker and covers more area. Then to stick on the wall I used double stick tape. (This is a must have for any creator!)

Sunday, February 26, 2012

Family Scrabble Picture

Here is something that I think that could be fun for any family.  I liked adding in meaningful words but you could leave it with just family names.


I first I started with a plain white canvas. You can use any size.


Then I painted it with the colors that I wanted. I like using a darker color to make the wood squares pop! Also I used leftover paint from painting my walls to make everything match. A neat thing to use to lay the canvas on is a opened up garbage bag. That way you can throw it away after you are done.


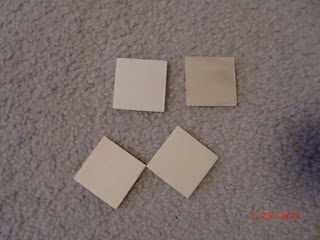
While the paint is drying I go to the next step. I bought pre-cut squares from my local craft store. Again these can be any size. (but about 1/4 of an inch thick). It all depends how big you want your picture and how many letters you use.


These are some that I used. Then I put sticker letters on my squares. This is the fun part. It can be any color or style. I did one with many different colors and fonts, which was fun, but for a more formal look I stuck with a simple black lettering. After placing the letters on the squares I then used "Mod Podge" over the letters and squares to give them a nice solid look as well as securing the stickers in place.


After all of this is done and dry, I then place letter squares and use craft glue to stick the squares to the canvas. Dry and put on your wall.  Also if you give as a gift make sure that you place wax paper over the squares to ensure that nothing sticks to them.

Others I have done.